

Why GitHub?
Suppose you are doing a project so you need to keep all the code in one place and it should be available for you all the time. And also you need to keep track of all the changes to the source code file in order to maintain the functionality of the project. All these tasks can be done and monitored just by using GitHub.
This blog will help you to learn the basic workflow of GitHub.
What is GitHub?
GitHub is a code hosting platform for version control and collaboration. It lets you and others work together on projects from anywhere.
How GitHub works?
To continue further, you'll need to have a GitHub.com account so that you can follow the below steps.
Here you'll know about the following -
- Create and use a repository
- Start and manage a new branch
- Make changes to a file and push them to GitHub as commits
- Open and merge a pull request
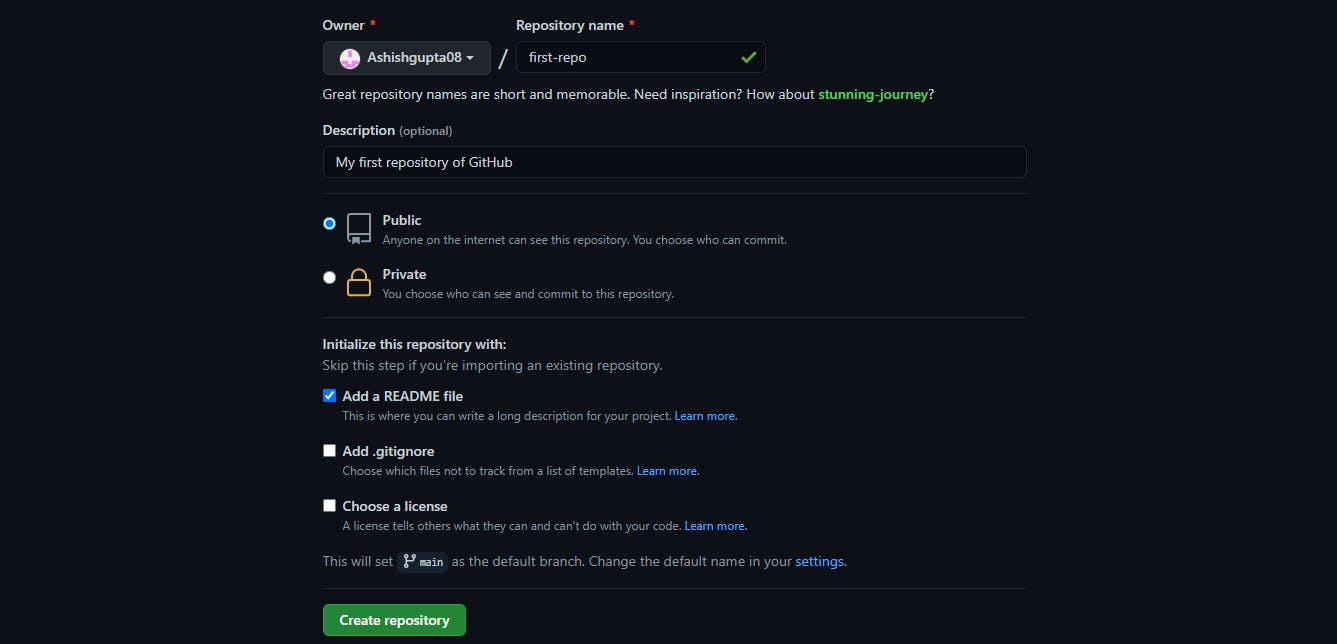
Step 1 - Create a new Repository
A repository is a way to organize your project. It can contain all types of files and folders, images, datasheets, audio, videos that your project will need.
Click on New Repository on the home page of your GitHub.com account. Give your repository a name and initialize it with the readme file and click on create repository.
After creating your repository, you can add any type of file you want to add to your repo.
Step2 - Create a Branch
By creating Branch to your repository you can work on different versions and features of your project at the same time.
By default, every repository has only one branch - main. You can also create your own branch and can work on the same.
To create your branch
- Go to your new repository.
- Click the drop-down at the top of the file list that says branch: main.
- Type a branch name.
- Select the Create branch box or hit “Enter” on your keyboard.

Step 3 - Make and Commit Changes
Till now, you have your first repository with a new branch.
On GitHub, saving the changes on your file is called Commit. Edit any of the files of your repository and commit the changes.

These changes which you made is available on your branch only and it's different from the main branch.
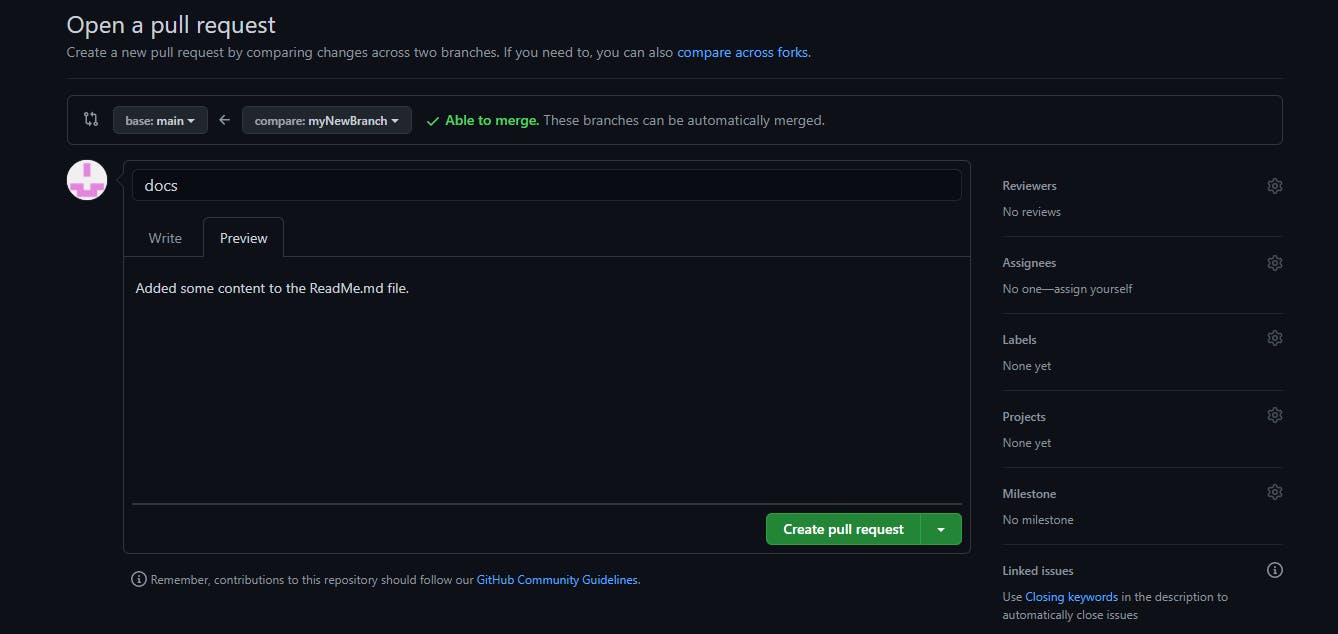
Step 4 - Open the pull request
Pull Requests are the heart of collaboration on GitHub. When you open a pull request, you’re proposing your changes and requesting that someone review and pull in your contribution and merge them into their branch. Pull requests show diffs, or differences, of the content from both branches. The changes, additions, and subtractions are shown in green and red.
Click the Pull Request tab, then from the Pull Request page, click the green New pull request button.
Check all the changes which have been done on the branch before creating the Pull request.
When you’re satisfied that these are the changes you want to submit, click the big green Create Pull Request button.
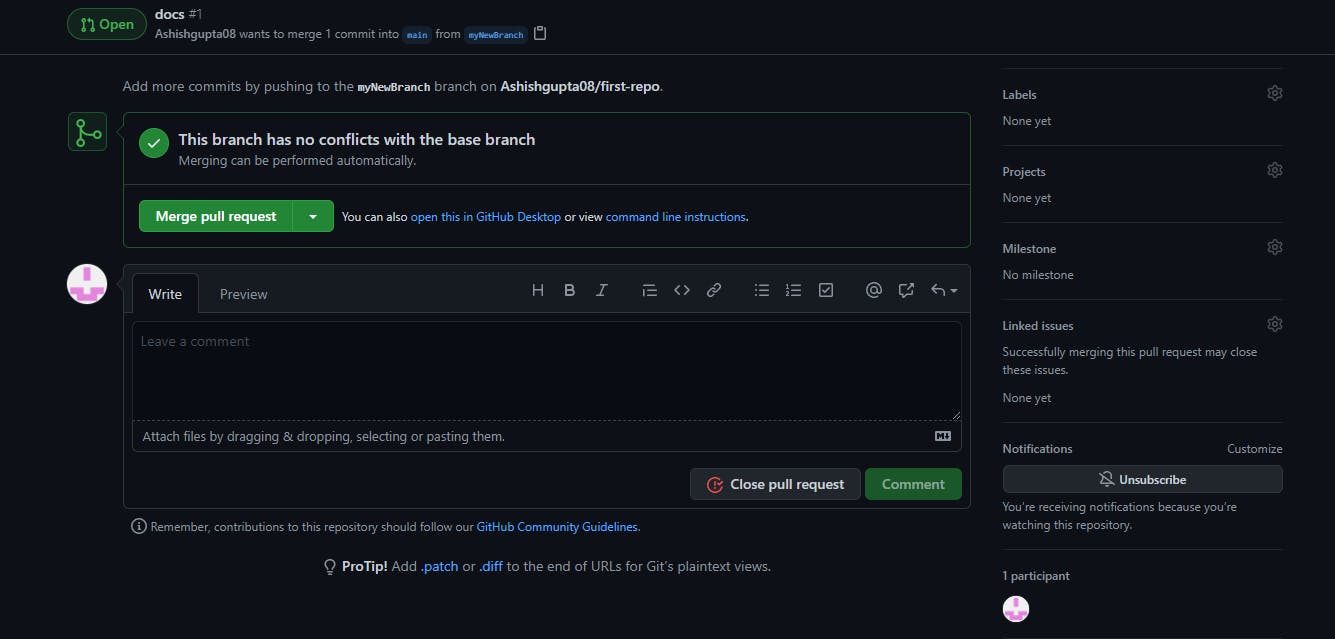
Step 5 - Merge the Pull Request
This is the final step to merge all your changes to your main branch.
Click the green Merge pull request button to merge the changes into the main branch.
Click Confirm merge.
Celebrate!
You have successfully created a new repository and made changes to the file by creating a new branch.
Now, you're aware that how much GitHub can help you in developing your project.